Setup
The goal of this section is to ensure the setup of a stable development environment. Therefore, it is recommended to follow these steps closely and to reach out in case of issues during the setup. Depending on the operating system steps might be different.
Prerequisite
Before you begin, make sure you have the following prerequisites in place:
The SDK zip-file provided by Universal Robots.
WSL2: For Windows Users the setup with WSL2 is mandatory.
Docker: Desktop/CLI.
Chrome: The only supported browser is Chrome.
Integrated development environment: Either Visual Studio Code or a Jetbrains IDE.
In case you are missing any of these prerequisites the next sections help with getting everything up and running.
Tip
Even if all prerequisites are met, it might be useful to ensure a proper setup by going through the sections below
Installation of Docker
The SDK is packed inside a development container. To open this container, Docker must be installed.
What is a development container?
A Dev Container is similar to what a virtual machine is. It often represents a small enclosed operating system. In the case of the SDK it is a linux based system. Within this container all dependencies needed to run the application, in this case the SDK’s build tools and the simulator, are preinstalled. Therefore, the SDK can be used on different OS without vastly different setups.
Install Docker
To install Docker it is recommended to install Docker Desktop, either for Windows, MAC or Linux. Docker Desktop includes all artifacts of Docker that are needed to run containers and features a GUI for easy control.
Note
If you are using a Mac with Apple Silicon, ensure that the ‘Use Rosetta for x86_64/amd64 emulation on Apple Silicon’ option is enabled in your Docker Desktop settings.
Installation of Chrome
The only supported browser by the PolyScope X Simulator is Chrome. To install it, follow the instructions On Chromes Website.
Installation of an IDE
To most efficiently develop URCaps an IDE (Integrated Development Environment) must be installed. The IDE needs to be able to work with Dev Containers as, the SDK is delivered inside such a Dev Container.
Following are two recommendations:
Visual Studio Code
Visual Studio Code is an IDE developed by Microsoft and available for all Platforms.
For VSCode it is recommended to install the Dev Container extension.
Open VSCode
Go to the Extensions view by clicking on the Extensions icon in the Activity Bar on the side of VSCode.
Search for Dev Containers and install the extension provided by Microsoft. This extension enables Dev Container support in VSCode.
(Optional) On Windows it is also recommended to install the WSL extension
IntelliJ
Besides VSCode IntelliJ is another popular option for development inside a Dev Container. As IntelliJ already comes with support for Dev Containers, it is not needed to install further extensions.
WSL for Windows Users
Important
This section is mandatory for Windows Users!
When running the SDK through the Dev Container on Windows, you will experience very slow performance when the Dev Container and all it’s files are placed on the Windows Host System. The reason for that is that the Dev Container is running on a Linux based System and needs to open remote connections to all the files stored in Windows. During processes with multiple read/write operations, this will result in significant slowdown.
To alleviate these issues it is recommended to place the Dev Container inside WSL. WSL(Windows Subsystem for Linux) is a subsystem that allows running Linux inside of Windows. After placing all the files of the Dev Container in that subsystem the Dev Container no longer needs to open remote connections and therefore all build processes are much quicker.
Note
For this guide Docker and VSCode needs to be installed
Open Microsoft Store on Windows, and download and install Ubuntu (22.04.3 LTS or newer)Ubuntu 22.04.03 LTS
Open Ubuntu by using Windows Start Button >> Ubuntu
A terminal will open and prompt you for credentials for a new user. Enter Username and Password to your liking.
In the terminal run:
sudo apt install unzip
In Windows explorer, find the Ubuntu “user home” folder.
To do so, first enter
\\wsl$in the Window Explorer address bar and hit enter do navigate to your WSL FolderNavigate to your Ubuntu Distribution (e.g. Ubuntu-22.04)
Navigate into the folder “home”
Navigate into the folder named like the Username you have chosen earlier in step 3.
Copy the SDK zip file from you windows file location to the “user home” folder inside the explorer.
Back in the Ubuntu terminal, navigate to the folder, that now contains the copied web-sdk zip file, by writing
cd ~/
Unzip the SDK zip file by writing
#X.XX.XXX is the Version of your PolyScope X SDK. For example unzip SDK-Polyscopex\ 0.10.103.zip
unzip SDK-Polyscopex\ X.XX.XXX.zip
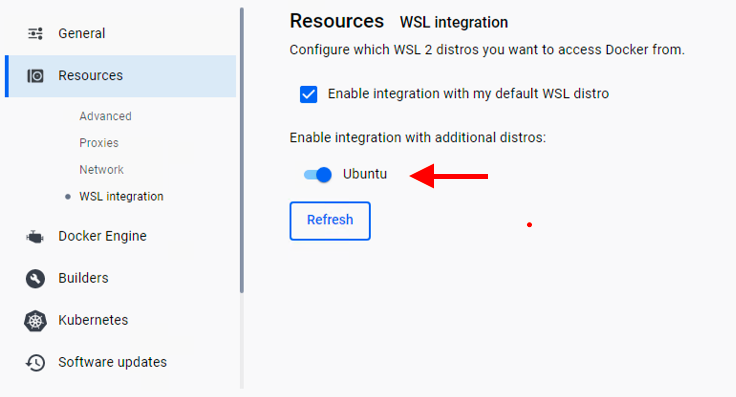
In Docker Desktop settings, enable the WSL Ubuntu integration under Resources >> WSL integration
In the Ubuntu terminal, navigate into the unzipped folder
#X.XX.XXX is the Version of your PolyScope X SDK. For example cd polyscopex-0.10.103
cd polyscopex-X.XX.XXX
In the Ubuntu terminal, start VSCode with
code .
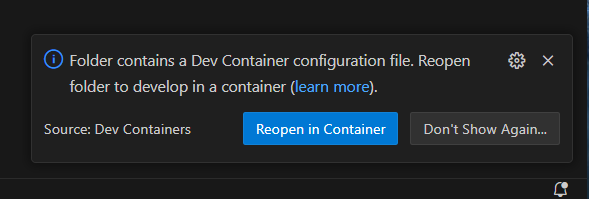
A popup in the bottom right of VSCode will appear, choose “re-open in container”
Now VSCode opens the Dev Container and runs it in Ubuntu. If any problem arises, see troubleshoot.
Open Dev Container
Opening the SDK in a Dev Container - VSCode
Note
If you are a Windows User and followed WSL for Windows Users you can skip this section
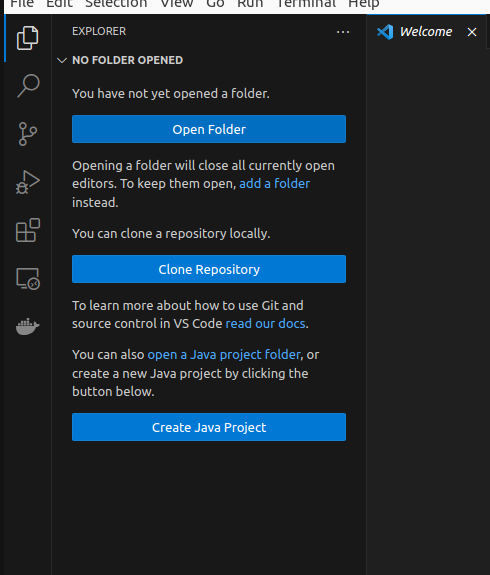
With VSCode open, press
Ctrl+Shift+N, orCommand+Shift+Non Mac, to open up a new windowPress
Open Folderto get a File manager and navigate to where you have extracted the “polyscopex.zip” file and choose thepolyscopexfolder
When opened the project structure should look similar to this
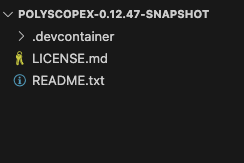
Where .devcontainer is the toplevel directory.
VSCode will detect the .devcontainer folder and prompt you to
Reopen in Container. Click on this option to create and start the Dev Container.
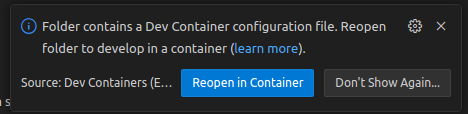
If you accidentally close the prompt you can also open up the Dev Container by pressing the small blue icon in the
lower left corner, and when a menu drops down select Reopen in Container
![]()
VSCode will build the Docker image and start the Dev Container based on your configuration.
Opening the SDK in a Dev Container - IntelliJ
When you open up the project in IntelliJ you want the project structure to look similar to this
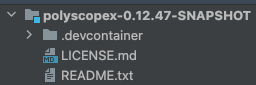
Where .devcontainer is the toplevel directory.
In the project window, open the .devcontainer folder and open the devcontainer.json file.
In the upper left corner press the blue gutter icon and choose “Create Dev Container and Mount Sources”
![]()
IntelliJ will build the Docker image and start the Dev Container based on your configuration.
Verify you are working in a Dev Container
When the devcontainer has started you can do the following steps to set up the simulator for usage.
You can verify that you are working inside the devcontainer by writing whoami
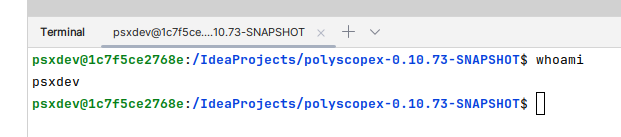
In which case it will say that it is psxdev.
Running the Simulator
Now that the Dev Container environment is fully setup, the SDK and Simulator has automatically been installed.
In the workspace home folder, there is a binary called run-simulator. Running this with
./run-simulator
will start the simulator, binding to port 80 as per default.
Runtime parameters
It is possible to specify a specific robot type when running the simulator, using the
--robotType parameter
./run-simulator --robotType UR10
In certain situations an IT department might decide to block usage of port 80. In this case you would be blocked from accessing the default PolyScope X application port. An example of the error message could be similar to the following:
Error response from daemon: Ports are not available: exposing port TCP 0.0.0.0:80 -> 0.0.0.0:0:
listen tcp 0.0.0.0:80: bind: An attempt was made to access a socket in a
way forbidden by its access permissions.
In this case you can use the --port parameter to specify a different one
./run-simulator --port 45000
This will make PolyScope X available at http://localhost:45000.
To see the full list of supported robot types, use the help parameter --help
./run-simulator --help
Troubleshoot
Installing docker in Linux
If you get a docker permission error when building a URCap, try run to the following in a cmd line:
sudo chmod 666 /var/run/docker.sock
and try building the URCap again.
Installing docker in Windows
When installing docker with wsl2, after rebooting, the following error may appear:
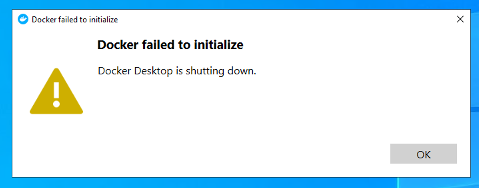
This happens because wsl_update_x64.msi is not installed yet. But wsl_update_x64.msi can not be installed before WSL2.
So the solution is to click ok and these warnings may show:
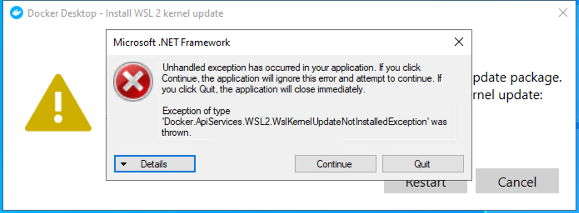
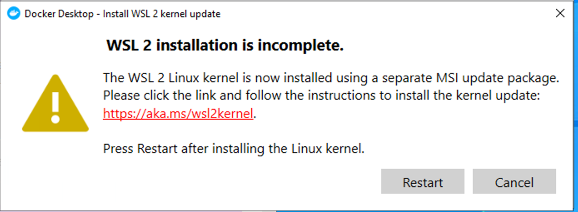
If the errors give you the link to the linux kernel. Use that to install it. Otherwise, you can also use this link.
Problems installing WSL on Windows
Depending on how and which version of Docker you installed, when installing and starting Ubuntu you might get this error:

To enable wsl in Windows run this in a terminal:
wsl --install
If you see this message when installing and starting Ubuntu:

It means that the feature “virtualization” needs to be enabled in the BIOS of your system, to utilize the WSL system. Refer to the BIOS manual of your brand for how to turn this on.