9. Importing 3D Models
Supported formats: GLB, GLTF.
Blender (free and widely available) is recommended for converting models from other formats.
There are known issues when importing CAD models over 40–50 MB. See Resetting Studio for how to clear browser data if the app becomes unresponsive.
9.1. End-of-Arm Models
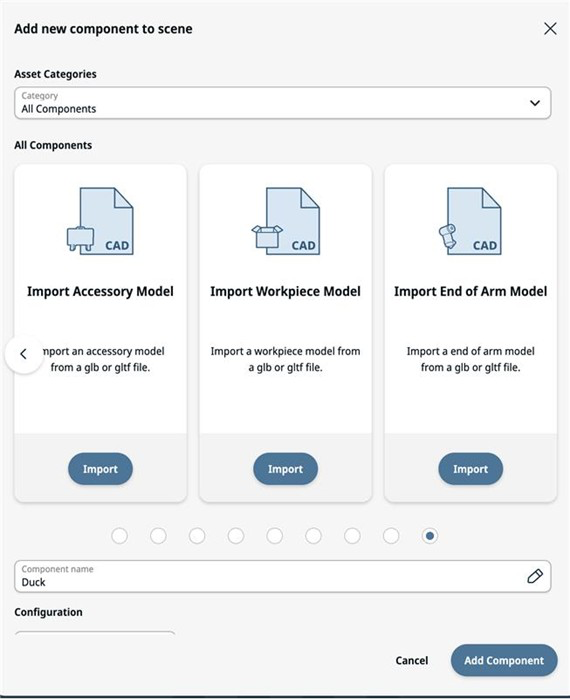
To import a 3D model as an End-of-Arm, open Add Component and select the End of Arm Tools category.
Choose Import End of Arm Model.
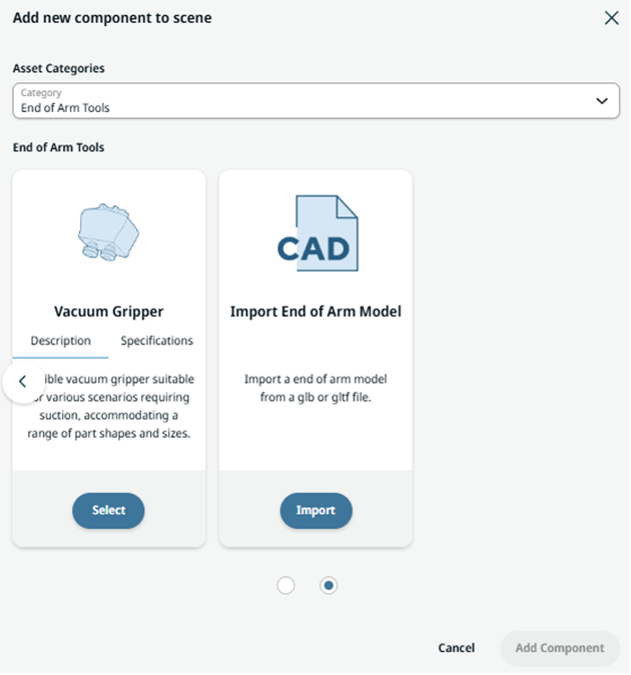
Import End of Arm Model catalog
Browse and select the model to use as an End-of-Arm.
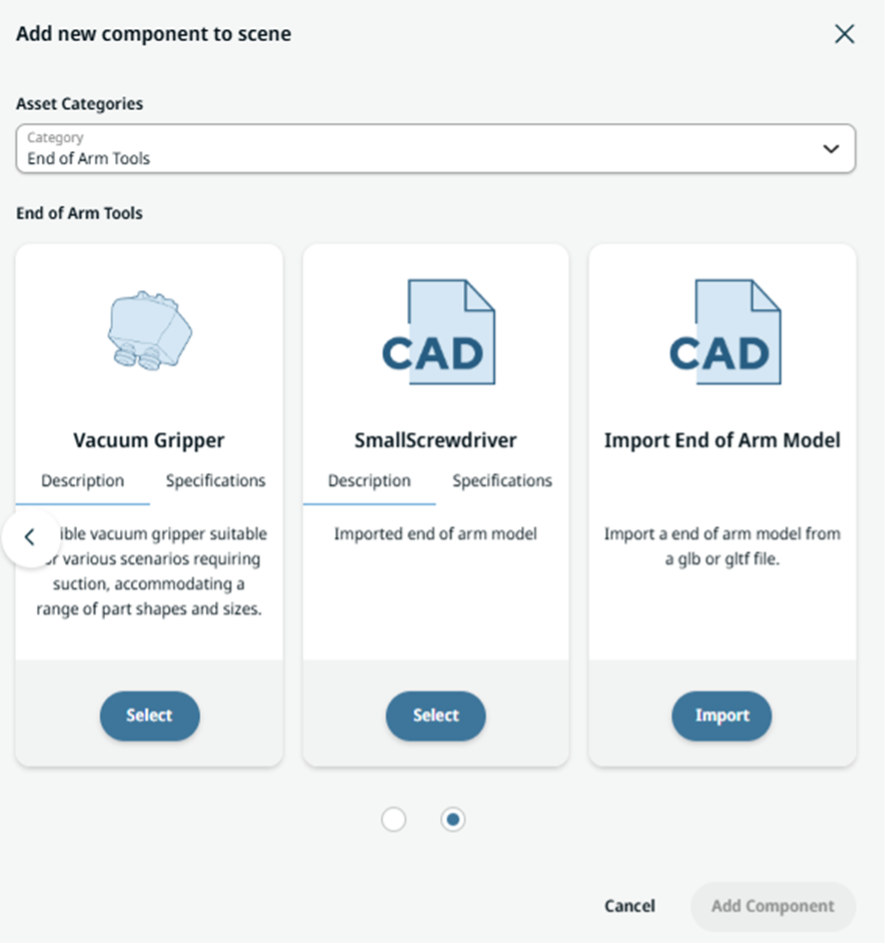
Imported CAD appearance after browsing
You can adjust the scale. This is useful because some software uses millimeters while others use meters by default. Adjust the scale to quickly match the correct real-world size.
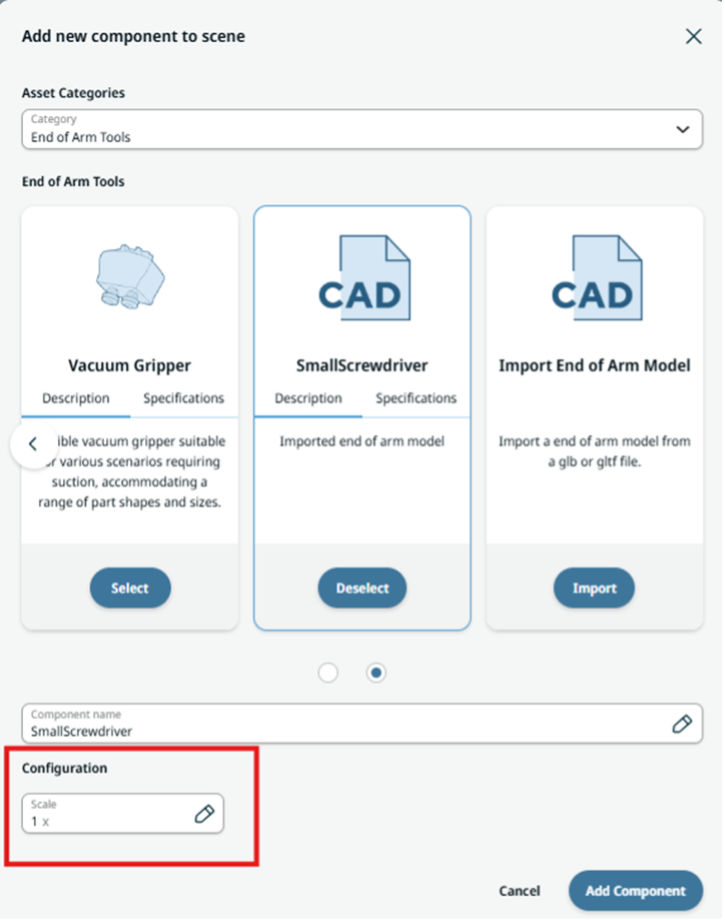
Scale
When importing a 3D model as CAD, a yellow gripper zone is created. A workpiece is picked when it contacts this zone and the corresponding signal is active. This simplifies creating Pick & Place operations. The picking action is controlled via the endEffectorOn connection in the object properties.
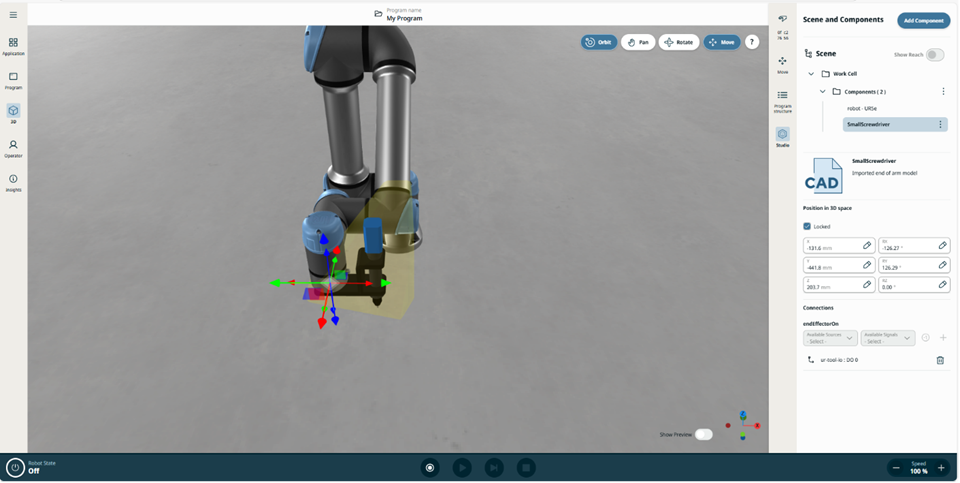
Imported custom End-of-Arm screwdriver as a CAD
You can reposition the 3D tooling by unlocking it and moving/rotating it to the desired pose.
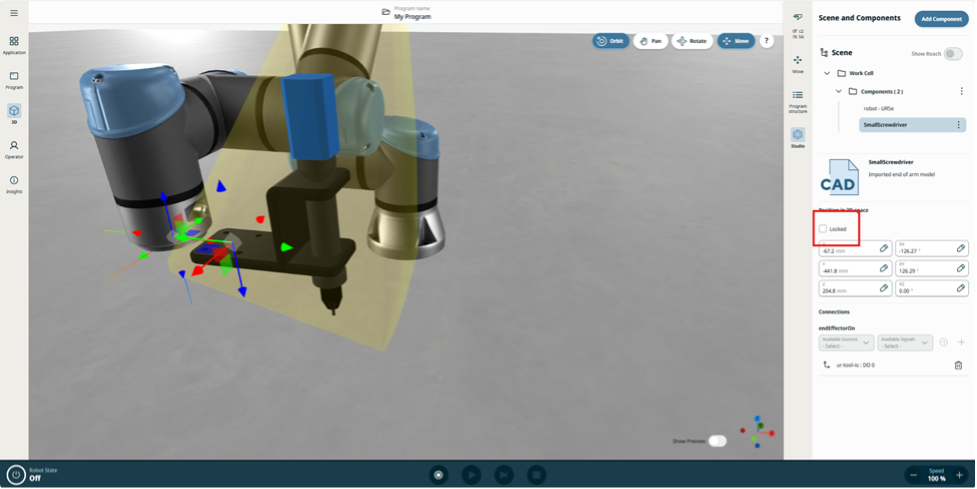
Unlock relative position to robot flange
9.2. Accessory Models
Import models as accessories for stands or fixtures.
Select Import Accessory Model.
Follow the same procedure as for End of Arm.
The imported accessory functions as a static element within the scene.
Importing CAD models
9.3. Workpiece Models
Import a model and adjust its scale as needed.
The 3D model will behave as a workpiece (similar to a system Box), including physics.

Import Workpiece Model
9.4. Reducing 3D Geometry in Blender
Reducing the vertex and face count (also known as polygon reduction or decimation) improves performance and optimizes models for Studio. Blender offers multiple workflows to achieve this:
9.4.1. Decimate Modifier
The most common and accessible method.
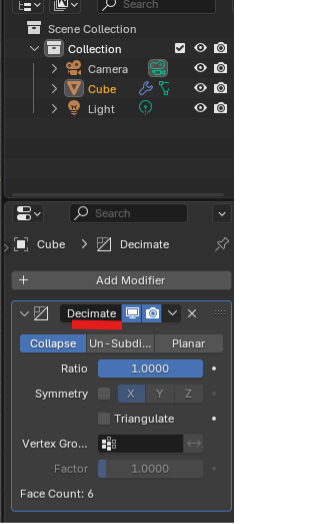
Decimate Modifier
How it works: Add it from Modifier Properties → Add Modifier → Decimate (Blender Docs).
Three main modes:
Collapse: Merges vertices based on a Ratio slider (1.0 = keep all faces; 0.5 ≈ half the faces) (Blender Stack Exchange).
Un-Subdivide: Reverses subdivided edges—best for grid-like topology. Adjust the number of Iterations (Blender Docs).
Planar: Dissolves edges on flat surfaces based on an Angle Limit, with options to preserve seams, sharp edges, UV islands, etc. (Blender Docs).
Tips:
Always preview before applying.
For cleaner results, enable Triangulate, Symmetry, or use Vertex Groups to control specific areas (Blender Docs).
9.4.2. Non-Modifier-Based Approach
Mesh → Clean Up → Decimate Geometry (Edit Mode)
A quicker, non-modifier approach.
Enter Edit Mode, select all or portions of the mesh.
Navigate to Mesh → Clean Up → Decimate Geometry, then set the Ratio (e.g., 0.5 to halve faces) (Sansar Docs).
Suitable for static models or avatars where a modifier is unnecessary.
9.4.3. Manual Cleanup Techniques
Useful for precise control or resolving artifacts:
Dissolve Vertices/Faces: Select problematic vertices or edges and use Dissolve to combine geometry without leaving hidden overlapping faces (Blender Stack Exchange).
Remove Doubles (Merge by Distance): Clean duplicate vertices before or after decimation.
Recalculate Normals: If shading artifacts appear, in Edit Mode select all and press Ctrl+N to fix normal direction (Reddit).
9.4.4. Community Tip
“Decimate Modifier is really the only way to do this easily… but manual cleanup guarantees the shape stays intact.” To export to glTF from Blender, remember to apply modifiers and uncheck +Y Up, as Studio uses +Z by default.
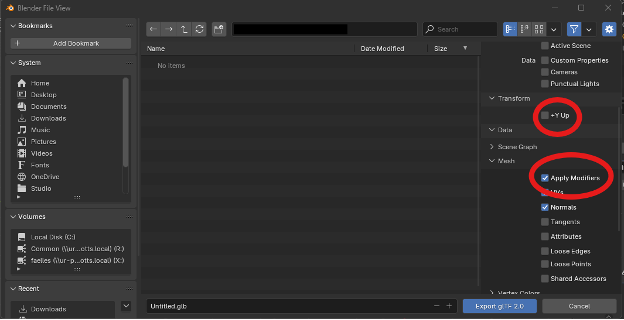
Export GLTF dialog in Blender